
Build Your Own Maze Generator In JavaScript
And a really difficult maze generator!


If you'd like to watch the process in a video you can check it out below . 👇
Introducing Mazes
Mazes are all fun and games, and there's something in all (probably not all) of us which makes us greedy to solve a maze puzzle, one after the other.
So instead of hastily searching the net for some real hard maze / labyrinth puzzles, why don't we make our own maze generator .
And no , it doesn't generate random passages , it's a real deal in making long winded corridors (That's really mind boggling).
The Concept
To achieve our goal, we need a defined algorithm that makes long, really long passages and yet it should be solvable (basically the entire point). Enter Depth First Search, an algorithm which is best fit for traversing graph-like data structures (oof, that's confusing). In simple terms, we can think of our maze as a grid consisting of cells or nodes, like this :
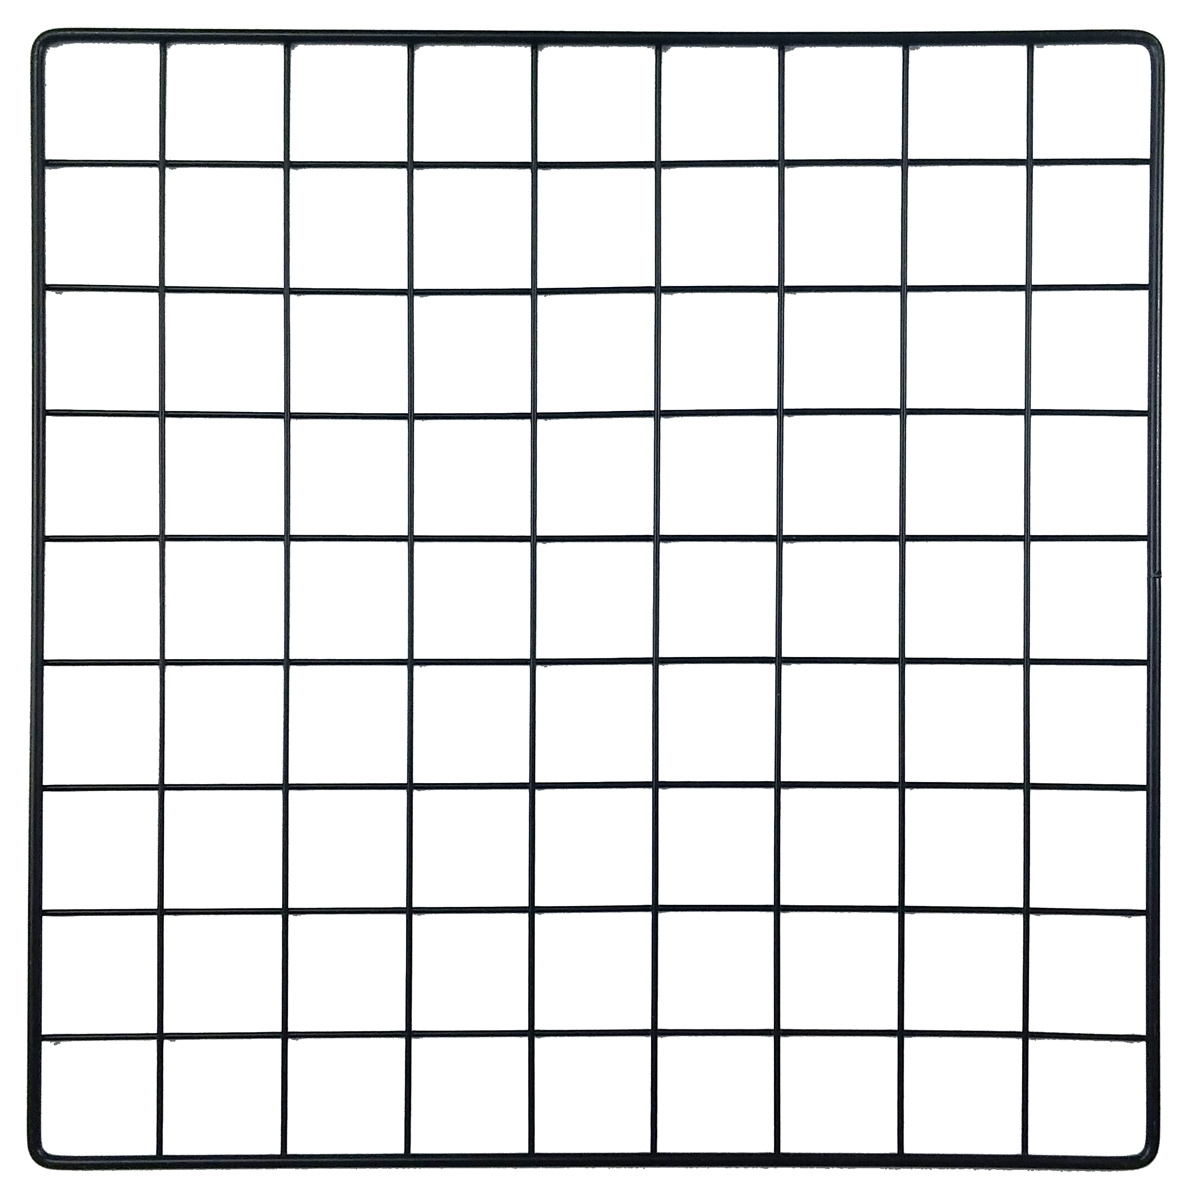
Now we can clearly see how each cell has four borders . We'll call them walls from now onwards . What DFS does here is that it starts checking from the start cell we defined , in all four cardinal directions . It checks for an unvisited neighbor and selects it as the next cell , then repeats the procedure . Note that the selection of the next node / neighbor is entirely random ,thus our algorithm essentially becomes Randomized DFS. Each time we visit the next node , we remove the border /wall that separates them (sorta like carving in). We repeat this until we hit a cornerstone or a point from where we can't further expand .
Here we begin the process of backtracking . Whenever we were expanding on a node , we were storing the previous node / cell in a stack . So to backtrack , we simply take the first item in stack, and move to that cell .We pop that item and take the next cell/item in stack , until the stack's empty .
That's the main task of this algorithm . Now let's move on to the actual fun part !
Implementation
The markup and styling
We'll first build the hefty markup :
<!DOCTYPE html>
<html lang="en">
<head>
  <meta charset="UTF-8">
  <meta name="viewport" content="width=device-width, initial-scale=1.0">
  <title>Document</title>
  <link rel="stylesheet" href="index.css">
  <script src="index.js" defer></script>
</head>
<body>
  <canvas></canvas>
</body>
</html>
Yep... that's it though we'll be manly using the canvas to render our maze.
Next we'll apply some basic styles:
body{
  background: #121212;
  display: flex;
  align-items: center;
  justify-content: center;
  height: 100vh;
  overflow: hidden;
}
The JavaScript
Creating the Maze
Now going to index.js , we'll first and foremost define some variables that'll hold access to the Canvas API .
const canvas = document.querySelector("canvas")
let c = canvas.getContext("2d")
let current;
You might ask , what in the world is "c" ?? . It's the context for our canvas and the reason why it's so shortly named is because you'll be using it very frequently in your program . So choose what you think is more convenient . The current variable stores the current cell our DFS algorithm is expanding from.
Next we'll build the Maze class :
class Maze{
  constructor(size,rows,columns) {
    this.size = size
    this.rows = rows
    this.cols = columns
    this.grid = []
    this.stack = []
  }
}
Size is a number which accounts for the height and width of our maze (assuming our maze will always be a square maze).The grid is 2D array for string the Cell instances , and the stack will be used in backtracking. Next, let's define the setup method:
class Maze{
  ...
  setup() {
    for (let r = 0; r < this.rows; r++){
      let row = []
      for (let c = 0; c < this.cols; c++) {
        let cell = new Cell(this.size, this.grid, this.rows, this.cols, r, c)
        row.push(cell)
      }
      this.grid.push(row)
    }
    current = this.grid[0][0]
  }

 ...
}
It's a straightforward approach of creating a 2D array . Right at the moment you'll stumble into an error as we haven't defined our Cell class … yet. Then we will add a draw method that actually renders the entire maze onto the webpage , and also instantiates the animation loop.
class Maze{
  ...
draw() {
    canvas.width = this.size
    canvas.height = this.size
    canvas.style.background = "black"

    this.grid.forEach((row) => {
      row.forEach((cell) => {
        cell.show() // This method will draw otu the walls of the cell
      })
    })

    this.DFSMaze() // We will implement this in a minute

    requestAnimationFrame(() => {
      this.draw()
    })
  }

 ...
}
And lastly we'll bring in the bread and butter , which is the algorithm .
class Maze{
  ...
DFSMaze() {
    current.visited = true
    let next = current.getRandNeighbour() // We'll also define this in a minute
    if (next) {
      next.visited = true
      this.stack.push(current)
      current.color = "green"
      current.highlight()
      current.removeWalls(current, next)
      current = next
    } else if (this.stack.length > 0) {
      current.color = "black"
      let cell = this.stack.pop()
      current.highlight()
      current = cell
    }

    if (this.stack.length == 0) {
      return
    }
  }

 ...
}
Let's break it down into bits .
We first mark the current cell as visited . Then we access the cell's method getRandNeighbour which basically gives us a random unvisited neighbor .Chances are that there may/may not be a neighbor available . Thus we check first if there's a neighbor cell in the if statement. If yes then we mark it as visited , push it to the stack and highlight it (for aesthetic purposes) .The important bit is that we remove the walls using the removeWalls method. Lastly we mark the next cell as current cell , and call the function again , repeating the entire procedure .
However the else condition is also very important. That is the actual backtracking part . When we can't find a cell , we check if the stack contains any cells, then we pop off the stack and set the current cell to that popped off cell .
But the third condition can also occur , where there are no more unvisited neighbors left and there aren't any cells in stack .All in all , this means that out traversal is complete and the maze is fully generated.
This completes the Maze class . It's time to implement the nodes and cells which we've been neglecting so far.
Creating the nodes / cells
We setup another class named Cell
class Cell{
  constructor(parentSize, parentGrid, rows, cols,rowNum,colNum) {
    this.parentSize = parentSize
    this.parentGrid = parentGrid
    this.rows = rows
    this.cols = cols
    this.rowNum = rowNum
    this.colNum = colNum
    this.size = parentSize / rows
    this.walls = {
      topWall: true,
      bottomWall: true,
      leftWall: true,
      rightWall: true,
    }
    this.visited = false
    this.neighbours = []
    this.color = "black"
  }

  ...
}
(Breathes in) The Cell class consists of the parentSize , so that it can dynamically calculate its own size ; the number of rows and columns ; its colNum and rowNum ; visited Boolean for whether it's visited ; the parentGrid reference ; and a walls object which keeps track of what walls does the cell have, along with a few other minor properties
Next we'll define a method to get all the unvisited/unexpanded neighbors .
class Cell{
...
setNeighbours() {
    this.neighbours = []
    let x = this.colNum
    let y = this.rowNum
    let left = this.colNum !== 0 ? this.parentGrid[y][x - 1] : undefined
    let right = this.colNum !== this.cols - 1 ? this.parentGrid[y][x+1] : undefined
    let top = this.rowNum !== 0 ? this.parentGrid[y - 1][x] : undefined
    let bottom = this.rowNum !== this.rows - 1 ? this.parentGrid[y + 1][x] : undefined

    if (left && !left.visited) this.neighbours.push(left)
    if (right && !right.visited) this.neighbours.push(right)
    if (top && !top.visited) this.neighbours.push(top)
    if (bottom && !bottom.visited) this.neighbours.push(bottom)
  }

getRandNeighbour() {
    this.setNeighbours()
    if(this.neighbours.length == 0) return undefined
    let rand = Math.floor(Math.random() * this.neighbours.length)
    return this.neighbours[rand]
  }
  ...
}
In our maze we only consider neighbors in cardinal directions , but you may later go ahead and diagonal neighbors and it wouldn't majorly affect the algorithm being used. Make sure you clear out the neighbors array as they later get updated.
The second method getRandNeighbour is really simple and only returns a random neighbor after setting the neighbors array .Next we'll define some methods to control the walls.
class Cell{
...
drawLine(fromX, fromY, toX, toY) {
    c.lineWidth = 2
    c.strokeStyle = "white"
    c.beginPath()
    c.moveTo(fromX, fromY)
    c.lineTo(toX, toY)
    c.stroke()
  }
  removeWalls(cell1,cell2) {
    let XDiff = cell2.colNum - cell1.colNum
    if (XDiff == 1) {
      cell1.walls.rightWall = false
      cell2.walls.leftWall = false
    } else if (XDiff == -1) {
      cell2.walls.rightWall = false
      cell1.walls.leftWall = false
    }
    let YDiff = cell2.rowNum - cell1.rowNum
    if (YDiff == 1) {
      cell1.walls.bottomWall = false
      cell2.walls.topWall = false
    } else if (YDiff == -1) {
      cell2.walls.bottomWall = false
      cell1.walls.topWall = false
    }
  }
  drawWalls() {
    let fromX = 0
    let fromY = 0
    let toX = 0
    let toY = 0
    if (this.walls.topWall) {
      fromX = this.colNum * this.size
      fromY = this.rowNum * this.size
      toX = fromX + this.size
      toY = fromY
      this.drawLine(fromX,fromY,toX,toY)
    }
    if (this.walls.bottomWall) {
      fromX = this.colNum * this.size
      fromY = (this.rowNum * this.size) + this.size
      toX = fromX + this.size
      toY = fromY
      this.drawLine(fromX, fromY, toX, toY)
    }
    if (this.walls.leftWall) {
      fromX = this.colNum * this.size
      fromY = (this.rowNum * this.size)
      toX = fromX
      toY = fromY + this.size
      this.drawLine(fromX, fromY, toX, toY)
    }
    if (this.walls.rightWall) {
      fromX = (this.colNum * this.size) + this.size
      fromY = (this.rowNum * this.size)
      toX = fromX
      toY = fromY + this.size
      this.drawLine(fromX, fromY, toX, toY)
    }
  }
...
}
The drawWalls method only checks for a true wall as in the walls object and accordingly sets the coordinates and calls the drawLine method. That method is again simple and only draws a line based on the to and from coordinates given to it. The removeWalls method removes walls based on the difference between X and Y coordinates.
The last 2 methods are for highlighting and showing the cell .
class Cell{
...
highlight() {
    c.fillStyle = "red"
    c.fillRect((this.colNum * this.size) + 1, (this.rowNum * this.size) + 1, this.size - 2, this.size - 2)
}
show() {
    this.drawWalls()
    c.fillStyle = this.color
    c.fillRect((this.colNum * this.size)+1,(this.rowNum*this.size)+1,this.size - 2,this.size - 2)
  }
...
}
This completes our class and now we can call them like this :
let maze = new Maze(500, 20, 20)
maze.setup()
maze.draw()
console.log(maze.grid)
Now you can check your browser and view how the maze forms before your eyes:

You can even see how it backtracks and carves into maze . (Quite satisfying to look at)

Hope you had enjoyed this post and I'll see you all in the next one . Keep coding ! 👨💻